Add a Deal
Add any deal directly in the workspace through the Deal Tab.
Deals can be added to a workspace in a number of ways.
- In bulk, via import
- From Outlook
- Or directly into any view in the workspace.
Below are instructions for the 4 methods to add a deal from within TermSheet.
📑 Learn to:
💡 Things to Consider:
To add a deal from Outlook, first install the Microsoft Outlook Add-In
⚙️ Steps
Add a Deal in TermSheet
-
Select Deals from the workspace header, then select All Deals.
-
Select a Static View. The deal will be created within the Static View that is selected in the sidebar.
-
Select "Add" from the upper right corner.
-
Select an option from the dropdown.
➕Enter Details - Add Deal Form

-
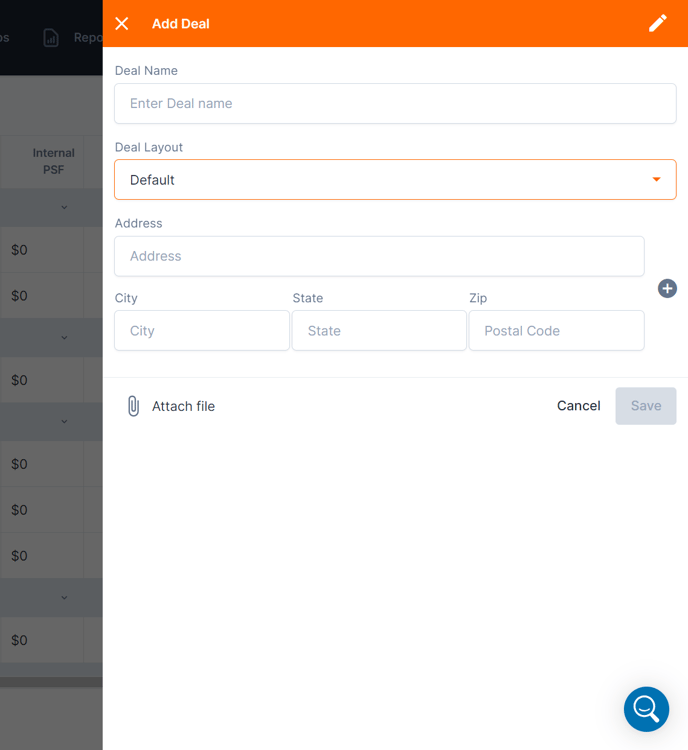
Enter a Deal Name - Take care to create a name that will differentiate this deal in a list view.
-
Select a Deal Layout Template to apply.
-
Begin typing an address associated to this deal.
If the address is recognized as a property that already exists in the workspace, it will be listed in orange at the top of the list.
If the address is not recognized as a property that already exists in the workspace, TermSheet will search Google for the address via Google Places and display a list in black below the existing properties.
-
To add additional addresses to the deal, select the + icon.

-
Add any other required deal information. The fields on the form may differ from workspace to workspace since each workspace can have custom fields added to the form.
- Select Save.
- If there are any addresses in the deal that already exist in another deal, a warning will appear. To review the deals with the potential duplicate addresses, select the "open in new tab" icon.

- If an address was entered in error, select "No" to return to the form and make corrections. To remove an address, select the - icon.

- Select Save (or select Yes in the duplicate deal warning message if applicable) to create the deal in the workspace. The addresses will be visible in the Locations panel.

Add by Latitude Longitude instead of Address
-
Enter a Deal Name - Take care to create a name that will differentiate this deal in a list view.
-
Select a Deal Layout Template to apply.
-
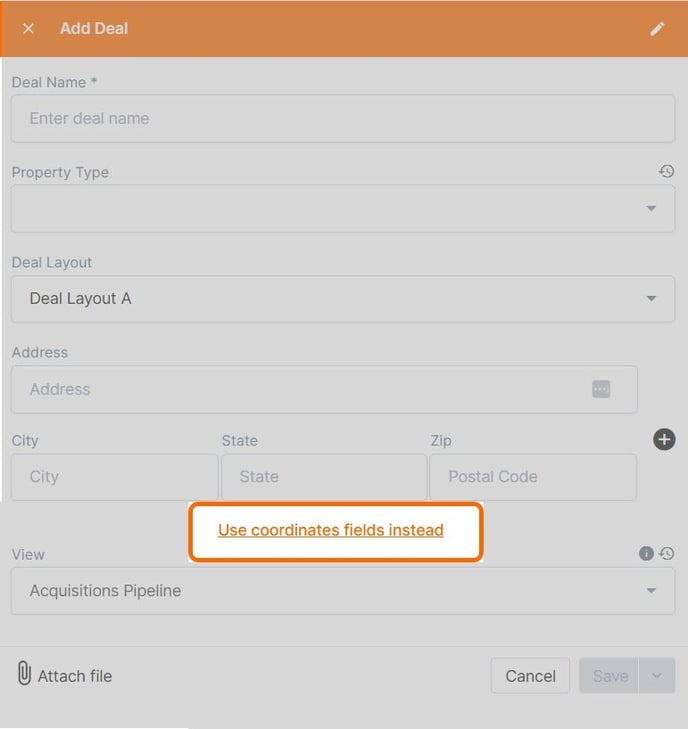
Select "Use coordinates instead".

-
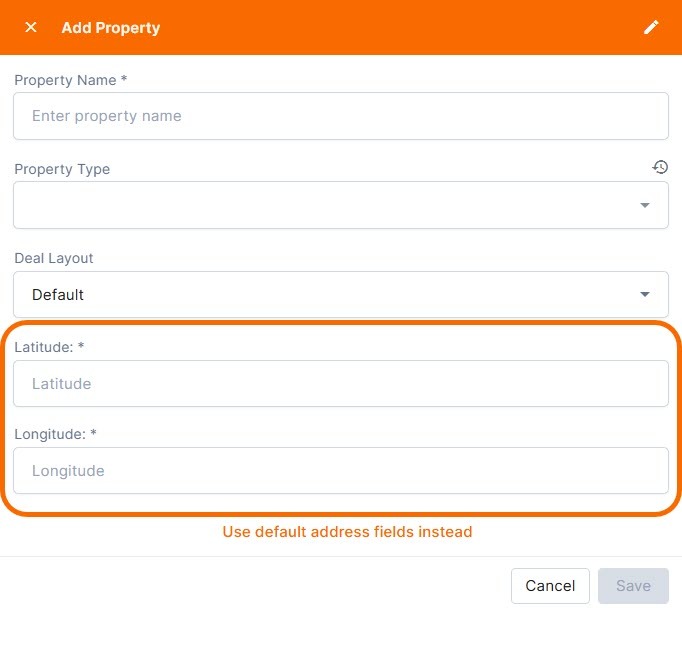
Add latitude and longitude in decimal degrees.
- Use the + icon to add additional coordinates.

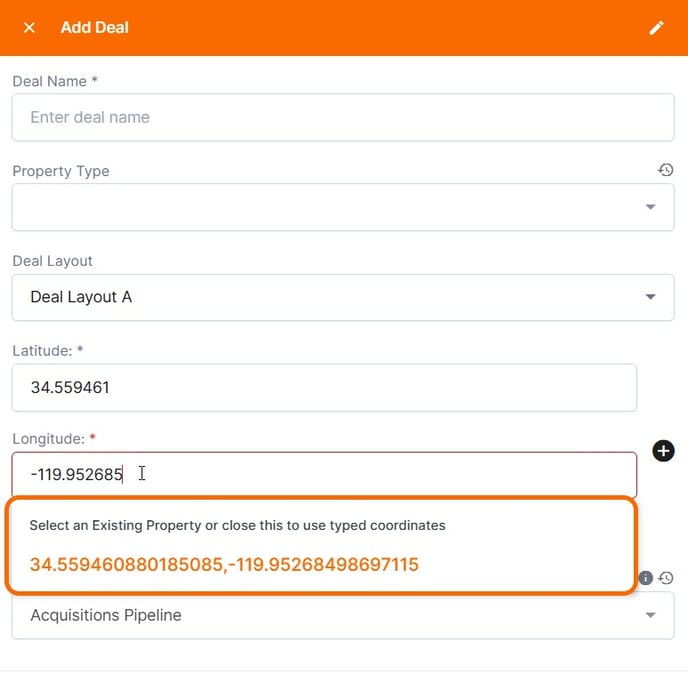
- Exact matches will appear in a dropdown as an existing property to reduce the chance of accidental duplications of property records. Select the existing property to associate the existing record.

If the coordinates do not already exist as a property record, one will be created called "Property from [latitude], [longitude]". - Select Save.
➕By URL
-
Copy the listing URL from Loopnet, Crexi, or Zillow.
-
Enter the URL into the field, then select "Save"
This method of adding deals to TermSheet is less reliable than other options as it relies on the location of the website's key metrics to remain the same over time.
📤Upload OM
-
Select the Upload OM option and the file explorer on the device will open. Select the file, then select "Upload".
-
The file will open into a screen to allow you to review.
-
Enter a Deal Name, Property Type, and Deal Layout from the dropdown fields in the right sidebar. These are required fields.
-
Next, within the body of the document, highlight information that should be added to the deal details. Once the text is highlighted, a menu of fields will appear. Select one of the fields to auto populate the text into the selected field.
-
Select Save to finish uploading the deal to TermSheet. The OM will be added to the Deal Level Files tab.
To use ETHAN AI to auto-populate the Deal Fields from the OM, the fields must already exist in TermSheet and be added to the "Add Deal Form".
The Deal Field added into the "Add Deal Form" should be an exact match to the details/metrics that should be pulled from the OM.
🌐Select on Map
-
The "Select on Map" option will open a map view where any parcel can be selected. Once selected the address will populate into the property field.
-
Enter a Deal Name, Property Type, and Deal Layout from the dropdown fields in the right sidebar. These are required fields.
-
Select Save to create the new deal.
