The import tool allows information to be added to TermSheet in bulk.
Add new data or update existing data in Deals, Contacts, Companies, Properties or Custom Objects.
Understanding Import Modes:
- Create - Add new data to TermSheet for the first time.
- Update - Edit existing data - this is the easiest way to make changes to fields in bulk.
- Create and Update - Add new data and edit existing data in a single import.
📑 Learn To:
Download and Complete a Blank Import Template
Perform an Import (Create)
Download Existing Data to Update via Import
Perform an Import (Update or Create and Update)
💡 Things to Consider
1. Use the standard field Address (
address_string ) only when the full address is available. - This field should contain the complete address (street, city, state, postal code) in the same cell.
- street (
street_address) - city (
city) - state (
state) - Postal Code (
postal_code)
3. If only latitude and longitude are available, there is no need to populate other address fields.
4. Address takes priority over latitude/longitude.
To update existing data with an import, the object ID is a required field.
Deal and Property ID's can be found by enabling the ID column in any list view.
Contact and Company IDs will be included automatically when the download icon is selected from the list view.
The import file must include only one row of headers. If there are multiple header rows, the import will fail.
Some fields in TermSheet are not importable.
Hidden fields are not importable.
To view which visible fields are importable, navigate to Fields under workspace settings and view the "Importable?" column. 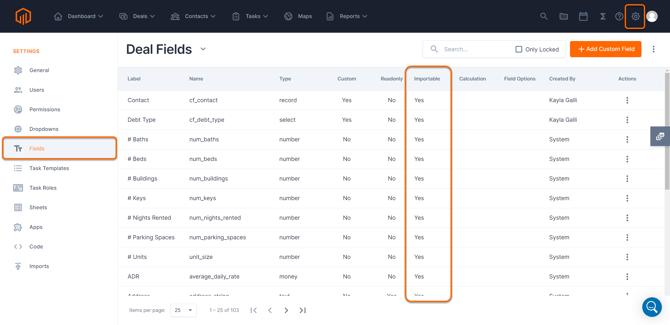
⚙️ Steps
Download and Complete a Blank Import Template
-
Select the gear icon in the upper right corner to navigate to the Account Settings.
- Select Imports from the Settings sidebar
- Select Download Template
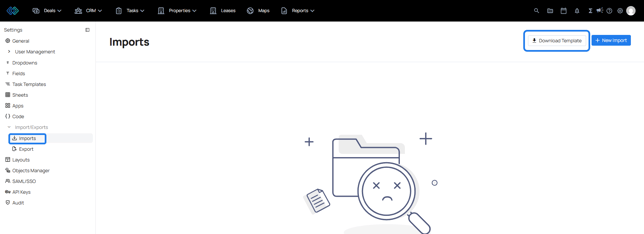
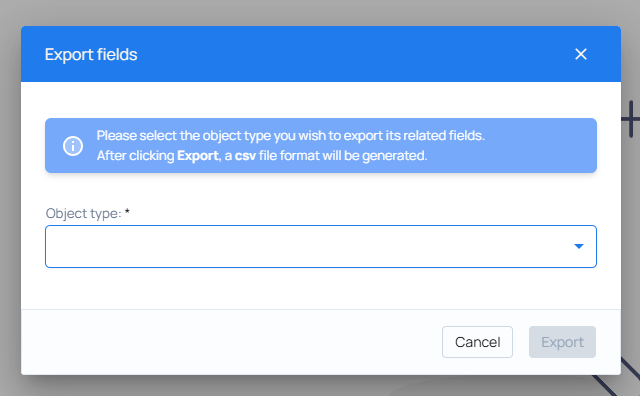
- Choose an object type from the dropdown then select "Export" to begin the download of a CSV import template for that object.
- Once the blank import template is downloaded, open the template and add or remove columns as needed.
Each import template has one required column which is outlined below. Do not remove the column(s) listed below or the import will fail.
Deals - Name column is required
Company - Name column is required
Contact - At least one of the following columns is required: Email, Phone, First Name + Last Name
Property - At least one of the following columns is required: Name or Street Address - Enter data to the template by row, then save the completed CSV.
- To import this template, choose "Create" or "Create and Update" as the Import Mode.
The CSV Import Template that is downloaded will include all importable TermSheet default fields and company custom fields that are existing in the workspace. (not all fields are importable. Review which fields are importable in workspace settings under Fields)
Custom fields can also be created while the import is being performed.
Removing or adding columns will not cause failures in the import unless the required column is removed.
Do not remove the Name field in any import template
Do not add additional header rows.
Perform a Create Import - Creates new records in the workspace
-
Select the gear icon in the upper right corner to navigate to the workspace Settings.
-
Select Imports from the Settings sidebar.
-
Select "+ New Import"

-
Select an object type from the dropdown.
- Select the mode, Create.
-
Next, select the completed import file. The file selected for import should include only 1 sheet and 1 row of headers. Accepted file formats are .xlsx and .csv.
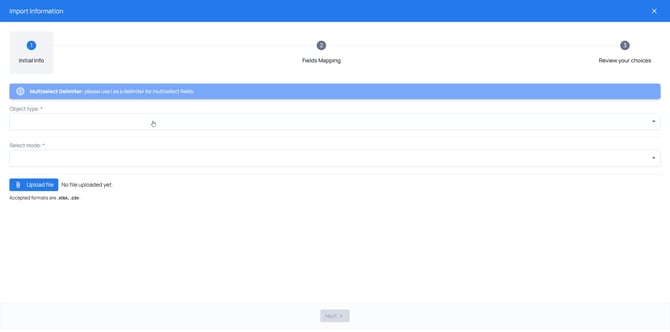
- Select Next to move on to field mapping.
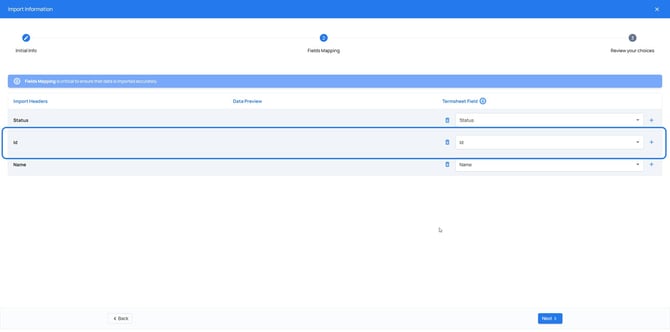
- Map the columns from the import template to fields in TermSheet by selecting the appropriate TermSheet field from the dropdown. This step is critical to ensure the data is imported accurately.
IMPORTANT: This step is key to ensuring the data is imported correctly. Be sure to complete this step without errors so that the data is imported correctly.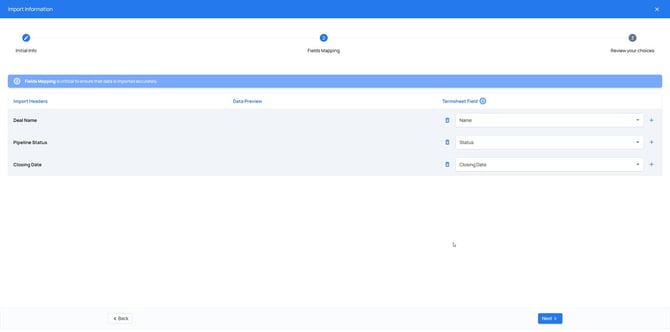
- Review the Data Preview Column which will show a few examples of the data that will be imported to the field chosen. Once the fields are mapped correctly, select Next to continue.
- Review and confirm that the field mapping in the final screen, then select Done.
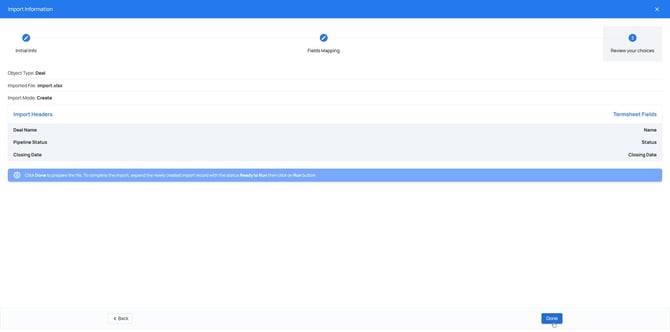
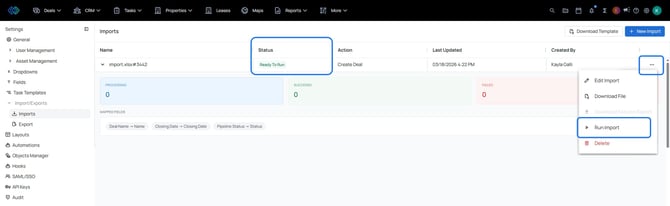
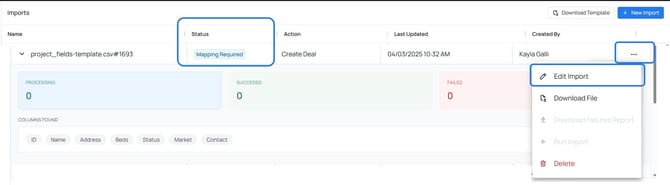
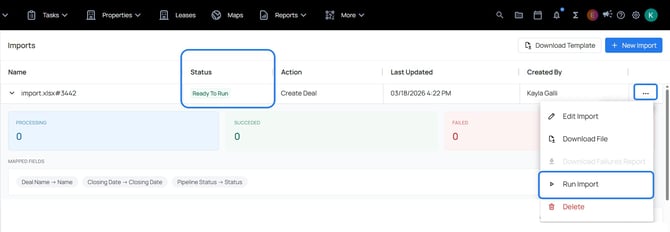
- The import will appear at the top of a list. When mapped completely, the import will be Ready to Run
- Select the menu icon to find Import Options. Select Run Import.
Download Existing Data to Update via Import
Export data that exists already in the workspace to start an update import.
- Navigate to Report Builder to create a new report.
- Enable the ID field for the object. The ID field is required for an update import.
- Download the export as CSV
- Make changes to the CSV file then save the file to the device.
- Proceed to "Update" or "Create and Update" Import.
Perform an Import (Update or Create and Update)
- Download the existing data from TermSheet as shown above.
- Make updates to the data in excel.
******************************IMPORTANT ****************************************
To update data, the ID column must stay the same. The ID column must be formatted as a number without commas.
*********************************************************************************** - Save the excel file as .xlsx or .csv
- Select the gear icon in the upper right corner to navigate to the workspace Settings.
- Select Imports from the Settings sidebar.
- Select "+ New Import"
- Select an object type from the dropdown.
- Select a mode. Select Update or Create and Update.
- Next, select the completed import file. The file selected for import should include only 1 sheet and 1 row of headers. Accepted file formats are .xlsx and .csv.
- Select next to move on to field mapping.
- Map the columns from the import template to fields in TermSheet by selecting the appropriate TermSheet field from the dropdown. This step is critical to ensure the data is imported accurately.
- IMPORTANT: The ID column must be mapped to the ID field in TermSheet to update existing records. If an ID is not present, a new record will be created.
- Review and confirm that fields are mapped correctly, then select "Done"
- The import will appear at the top of a list. When mapped completely, the import will be "ready to run".
- Select the menu icon to find Import Options. Select Run Import
Import Status
Mapping Required
Field mapping is not complete. Select Import Options to edit the import and map fields.
In Queue
Imports may show a status of "In Queue". This happens when there is a unusually high load of requests. Users can navigate away from the page and return when the import is ready to run.
Ready To Run
Import has not been started but is ready to be started. Select Import Options to Run the Import.
Running
Import is In Progress. User can navigate away from the imports page and the import will run in the background. 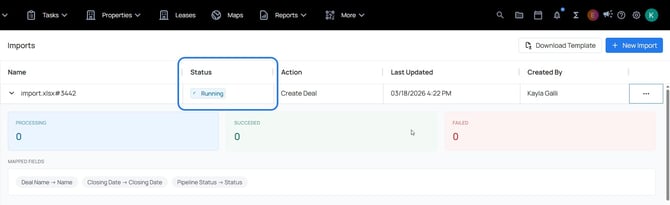
Imported
Import completed successfully, without errors.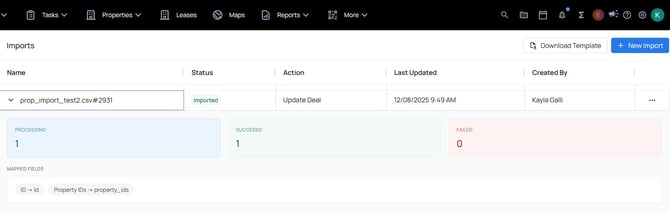
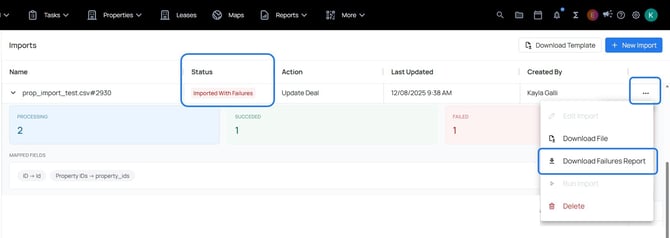
Imported With Failures
Import has not completed or has partially completed with errors. Download failures report to view import errors on a csv. Correct the issues listed in the Imports Errors column and reimport.