DocMerge for Word / PDF Documents
With DocMerge, teams can easily export data from any deal into a documents template.
Save your team hours of time by eliminating the need to sift through versions of models and deal data to manually enter onto document templates.
Upload the document templates you’re already using-- complete with your branding, letterhead and formatting.
With a few simple mapping steps any word/pdf document can be dynamically generated, pulling all of the key data points and placing them exactly where you need them.
📑Learn To:
💡Things to Consider
DocMerge for Word leverages the Mail Merge technology from Microsoft Word to map deal fields from TermSheet into an existing document template.
Files must be saved as .docx
Word For Mac may not contain all of the required functionality to set up the DocMerge Templates.
DocMerge for PDF leverages the Prepare Form functionality within Adobe.
Merging Images to PDF is not currently supported.
Files must be saved as .pdf
Create any fields you will need in TermSheet first, if they do not exist already.
⚙️Steps
Map a Template in Microsoft Word
- Open the document template in Microsoft Word.
- Select the space where the TermSheet data should be mapped into.
- Select "Insert" from the Microsoft Word ribbon menu.
-
Select "Quick Part"
-
Select "Field"

- Select "MergeField" and find the "Field Name"

- In "Field Name", enter an equal sign (=) then copy/paste the TermSheet field name exactly as it is displayed in the workspace settings.
Example: =cf_contact
- Select OK to Save.
- Repeat steps 2-8 for each field that should be mapped to the template.
- Save this mapped version as your new company wide template, ensure all team members use this version moving forward.
- Select the settings gear icon, then select Object Manager. Select the object where users will generate the merged document.

- Select the Configuration Tab, then select Upload Template.

- Select the file from your device file explorer and select open.
- To remove files from the list of available templates, select the three dot menu to the right of the template file.

Map Images to Word Docs
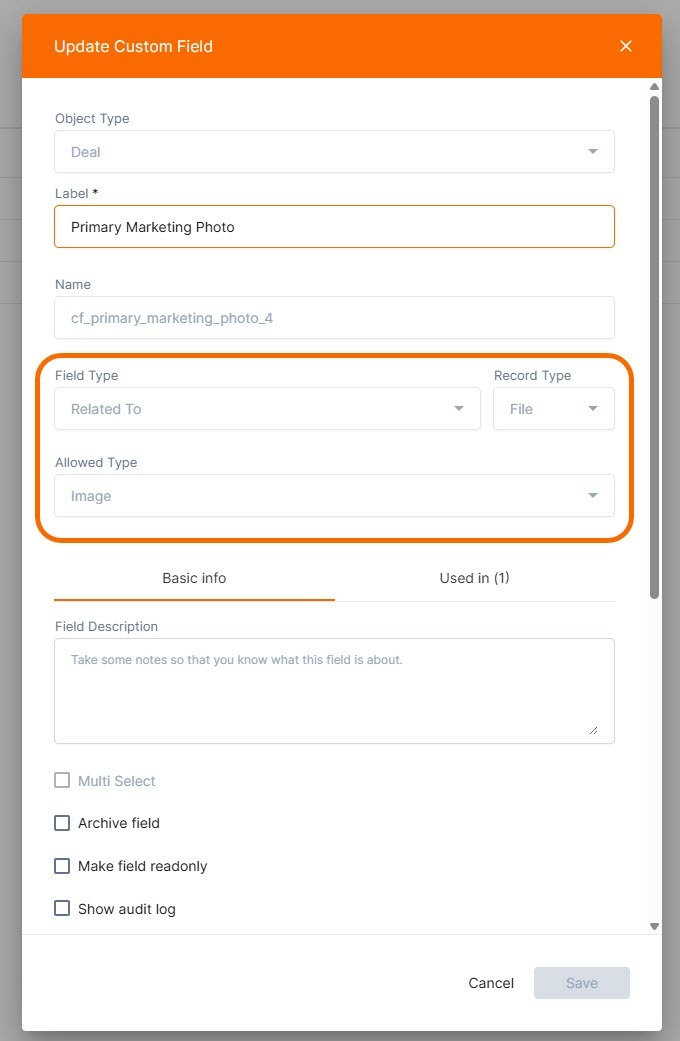
Mapping Images into PPT DocMerge requires a "Related To File" field type.
The "Allowed Type" MUST be "Image". 
- Upload an image to a field in a supported format: .jpeg, .jpg, .png, or .webp

- Open the Word Document Template
- Add a placeholder image to the template.

- Select the line above the placeholder image. Select "Insert" from the Microsoft Word ribbon menu.

-
Select "Quick Part"
-
Select "Field"

- Select "MergeField" and find the "Field Name"

- In "Field Name" enter an @, then copy/paste the TermSheet field name exactly as it is displayed in the workspace settings. Enter ":start" at the end of this string.
EX: @cf_image_field:start - Select the line below the placeholder image. Select "Insert" from the Microsoft Word ribbon menu.
-
Select "Quick Part"
-
Select "Field"

- Select "MergeField" and find the "Field Name"
- In "Field Name" enter an @, then copy/paste the TermSheet field name exactly as it is displayed in the workspace settings. Enter ":end" at the end of this string.
EX: @cf_image_field:end
- Save the configured template.

- In TermSheet, select the workspace files from the header. Upload the saved mapped template.

- Now the file can be used to generate a DocMerge. The image that is uploaded to the field in TermSheet will replace the placeholder image on the template.
Map a PDF form
-
Open a template in Adobe Pro, then select “Prepare Form”.
-
Insert form fields into your PDF (If you have existing form fields then you can skip to step 4)
-
In each form field map the TermSheet field name by entering it exactly as it is shown in TermSheet.
Example: cf_contact
-
Select save.
-
Save this mapped version as your new company wide template, ensure all team members use this version moving forward.
-
In TermSheet, select the workspace files from the header. Upload the saved mapped template.
Generate a Merge Document
- Select any deal
- Select the ⁝ icon
- Select "Generate Merge Document"
- Using the dropdown, select the mapped template.
- A download will begin that inserts any field data into the template.
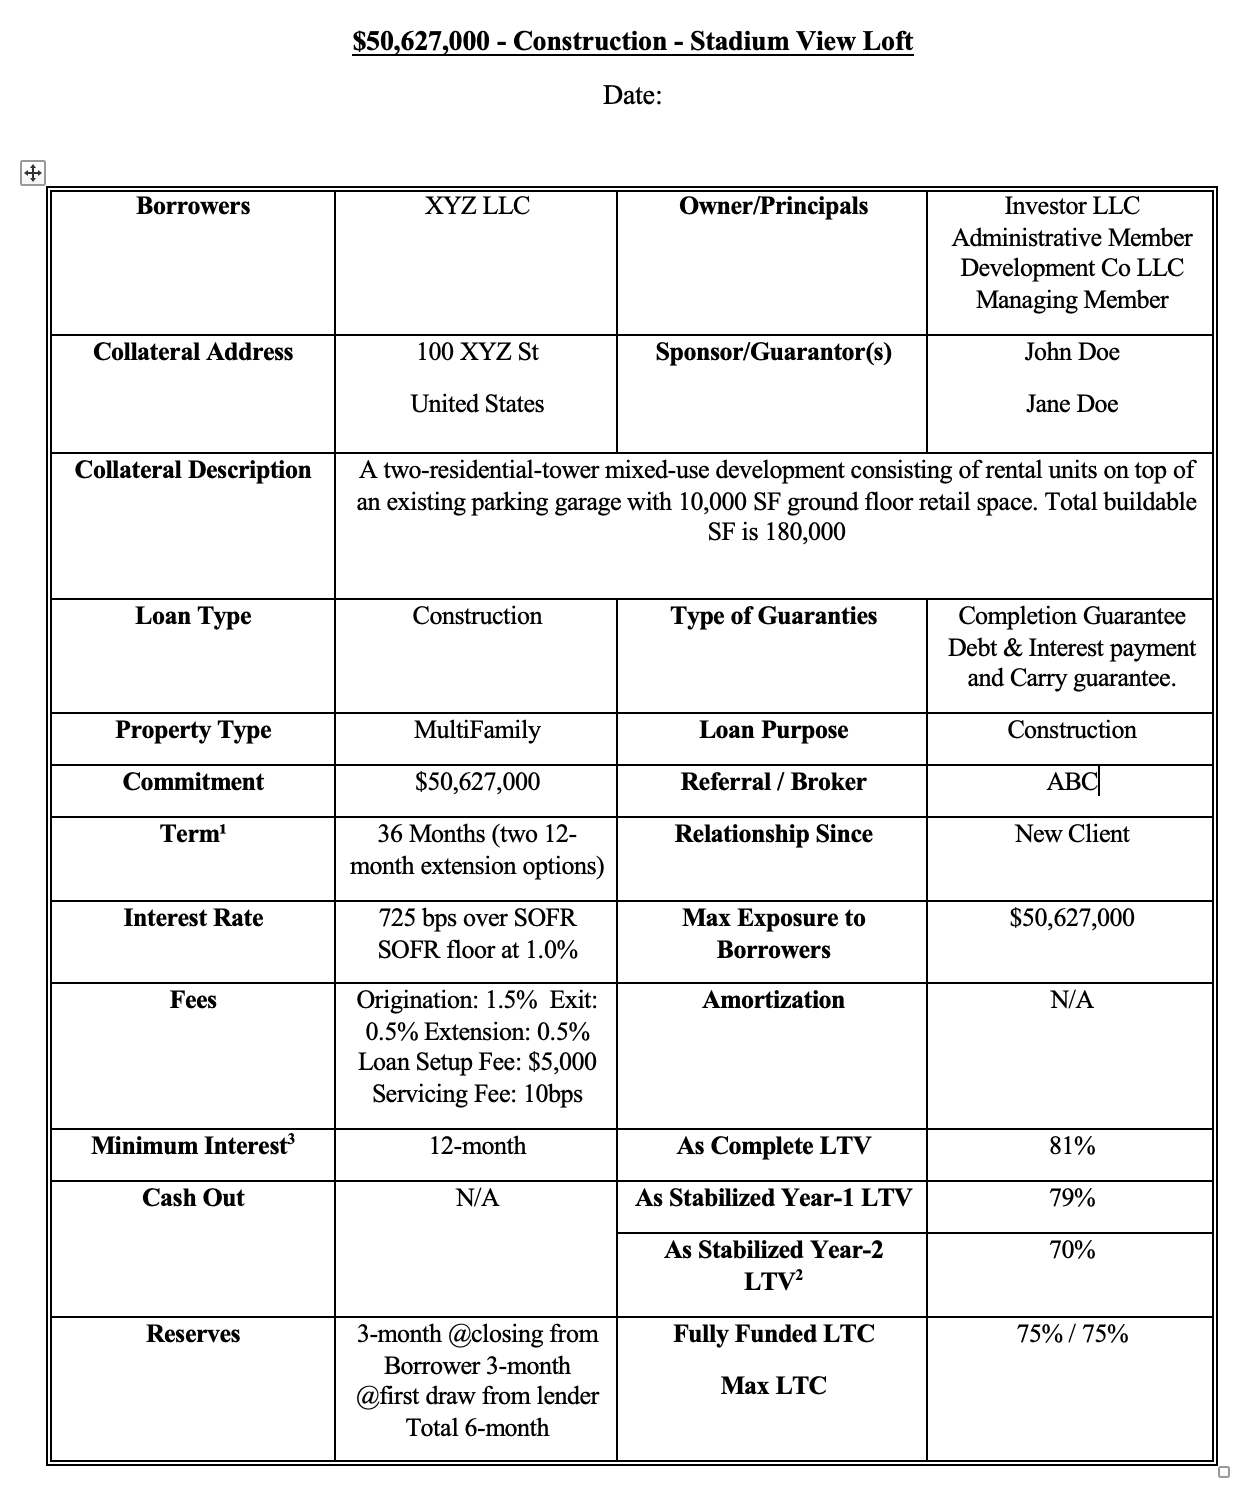
See sample memo with relevant data included below: